How to Find IPO Mandate on UPI Apps

Greetings Investors!
Last year more than 10-12 IPOs went live. Some of them were subscribed more than 150 times their issue size. Many IPOs saw bumper retail investor subscriptions.
This year has a bigger line-up.
Let’s have a look at how do you approve IPO mandates on different UPI apps in this blog.
What is an IPO mandate?
The money gets blocked for use from your bank account but will show up in your main account balance. If you receive the subscription, the money will get deducted from your account; if not, the money will be released for use. Your UPI app will use the IPO mandate granted by you to perform these actions on your bank account.
After you apply for an IPO on Groww and use a UPI app for payment, you will receive an approval request on your app to set up the mandate. There may be a slight delay in receiving the request, so please be patient.
How to Find IPO Mandate on Groww
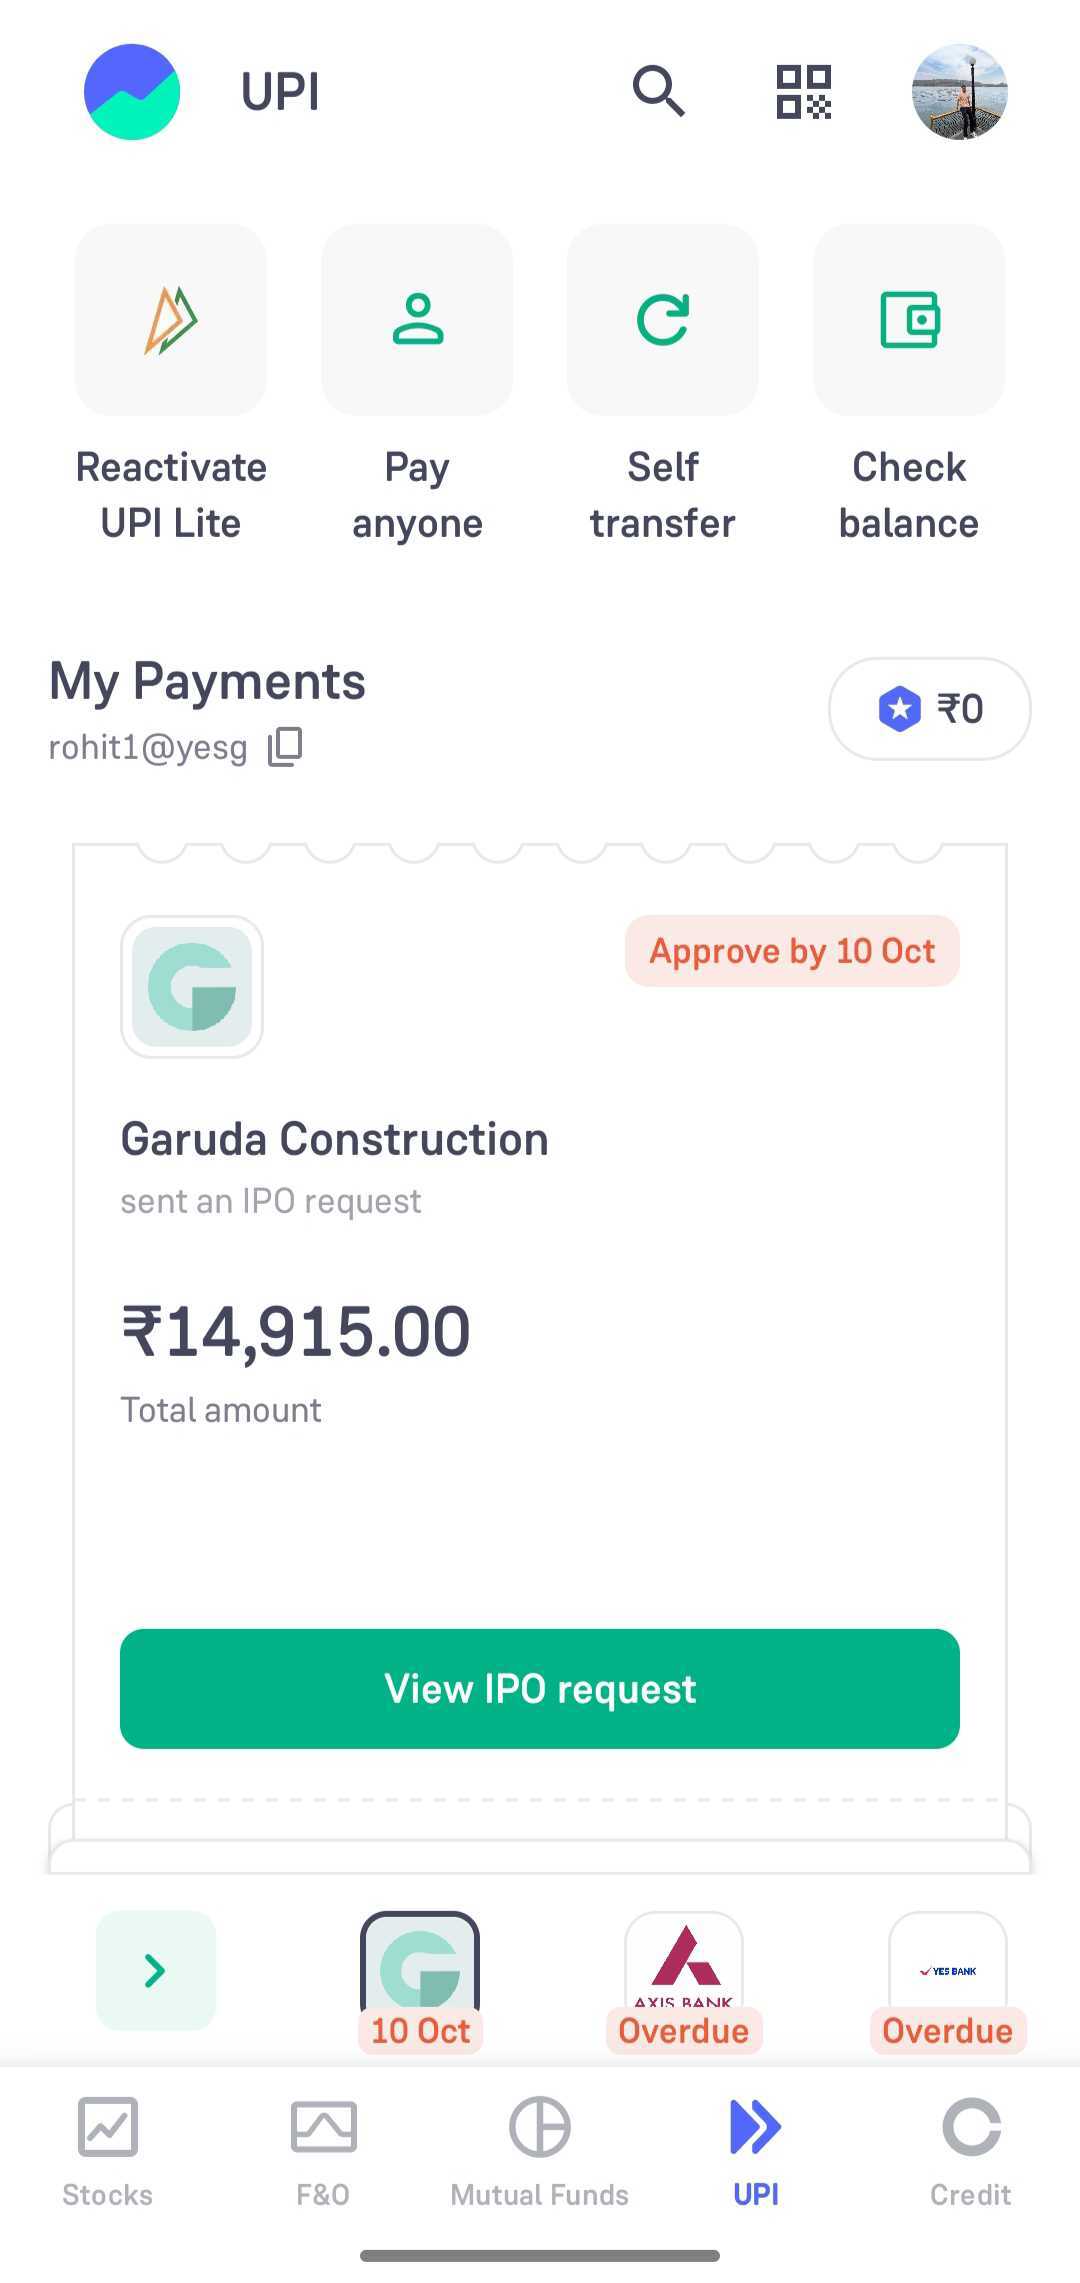
Step 1: Open the Groww App on your mobile and go to the ‘UPI’ tab. You will find the IPO request at the top of the page.
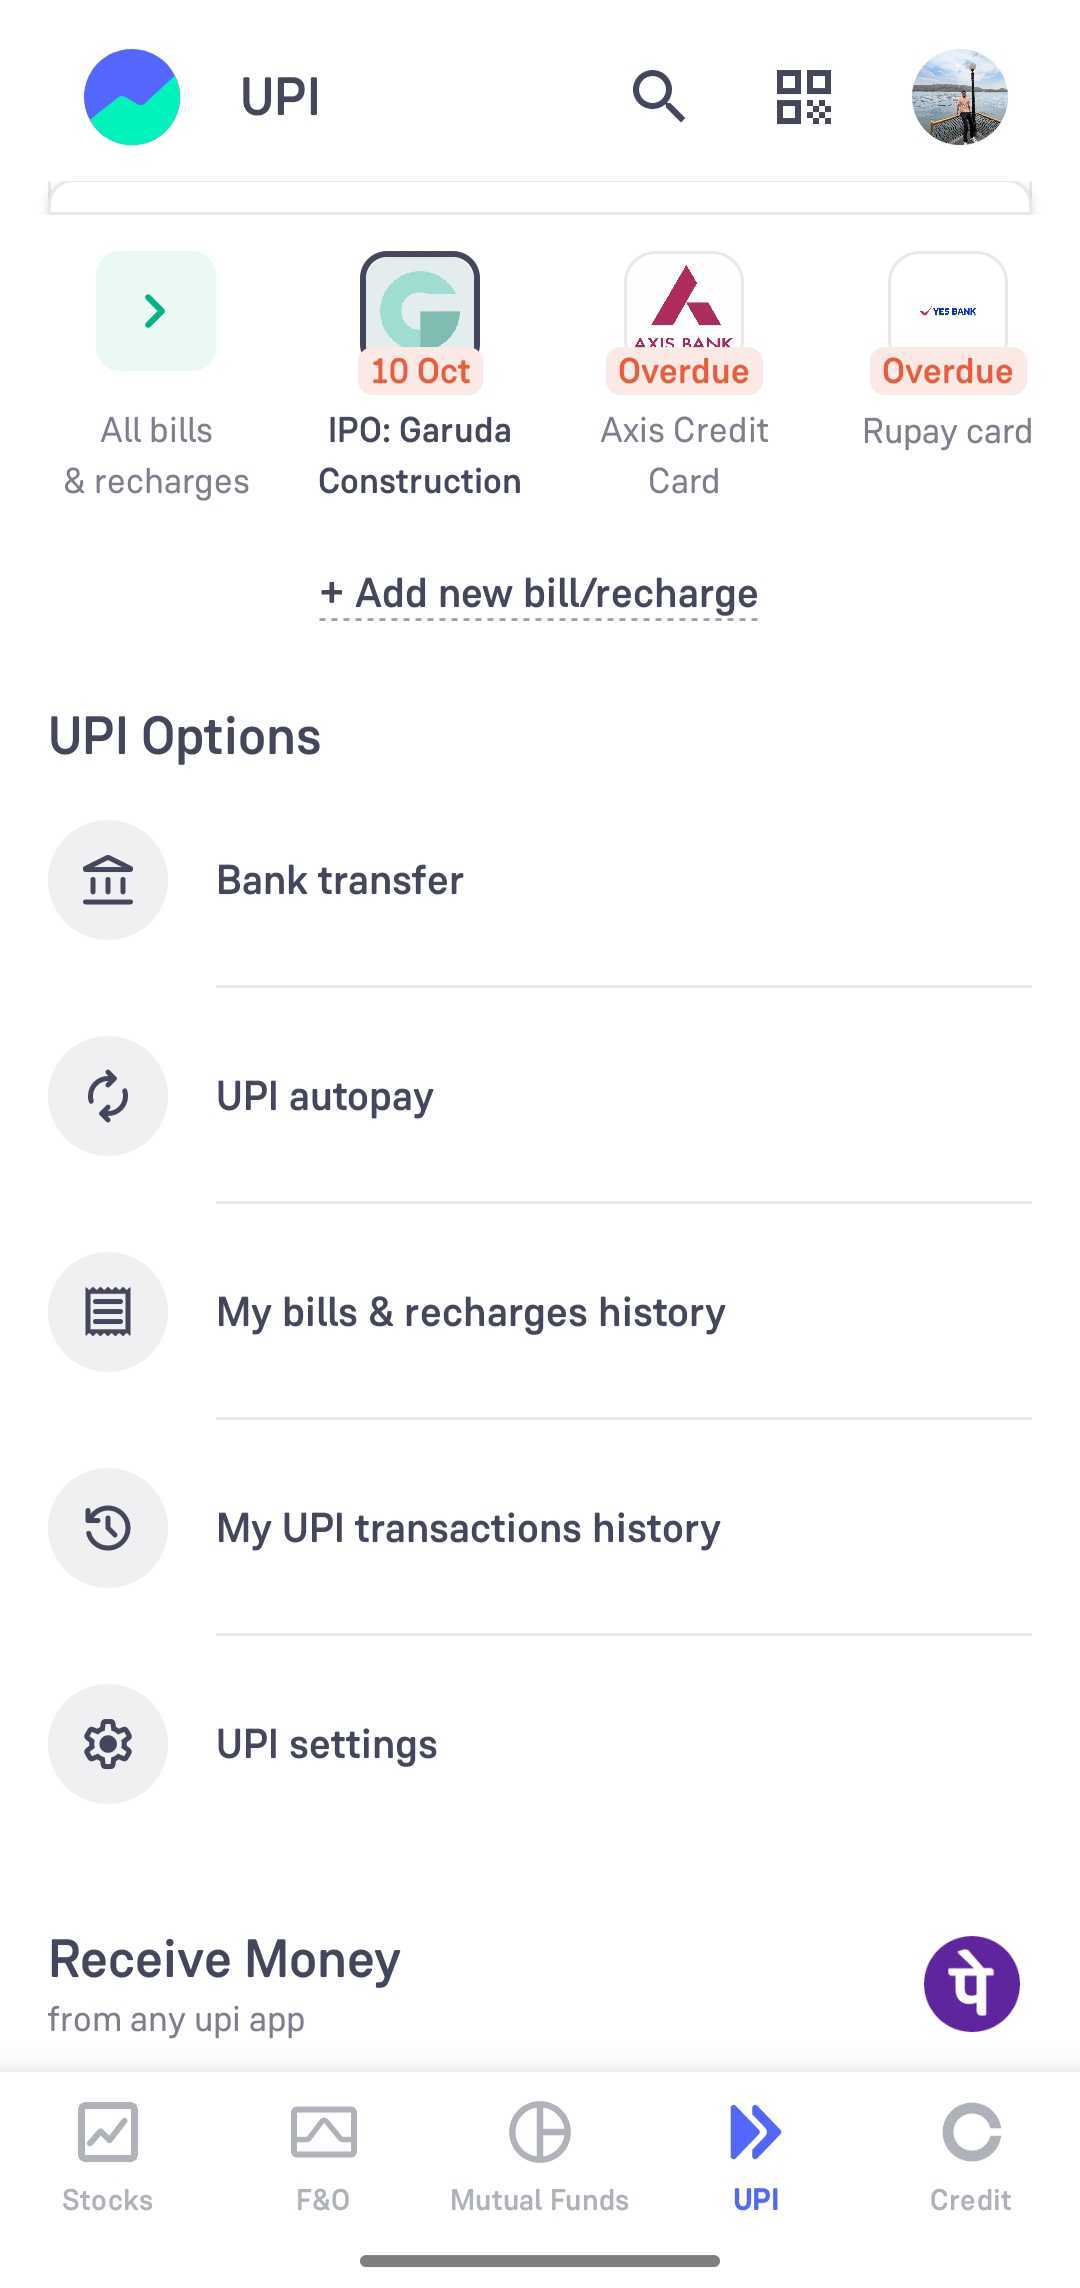
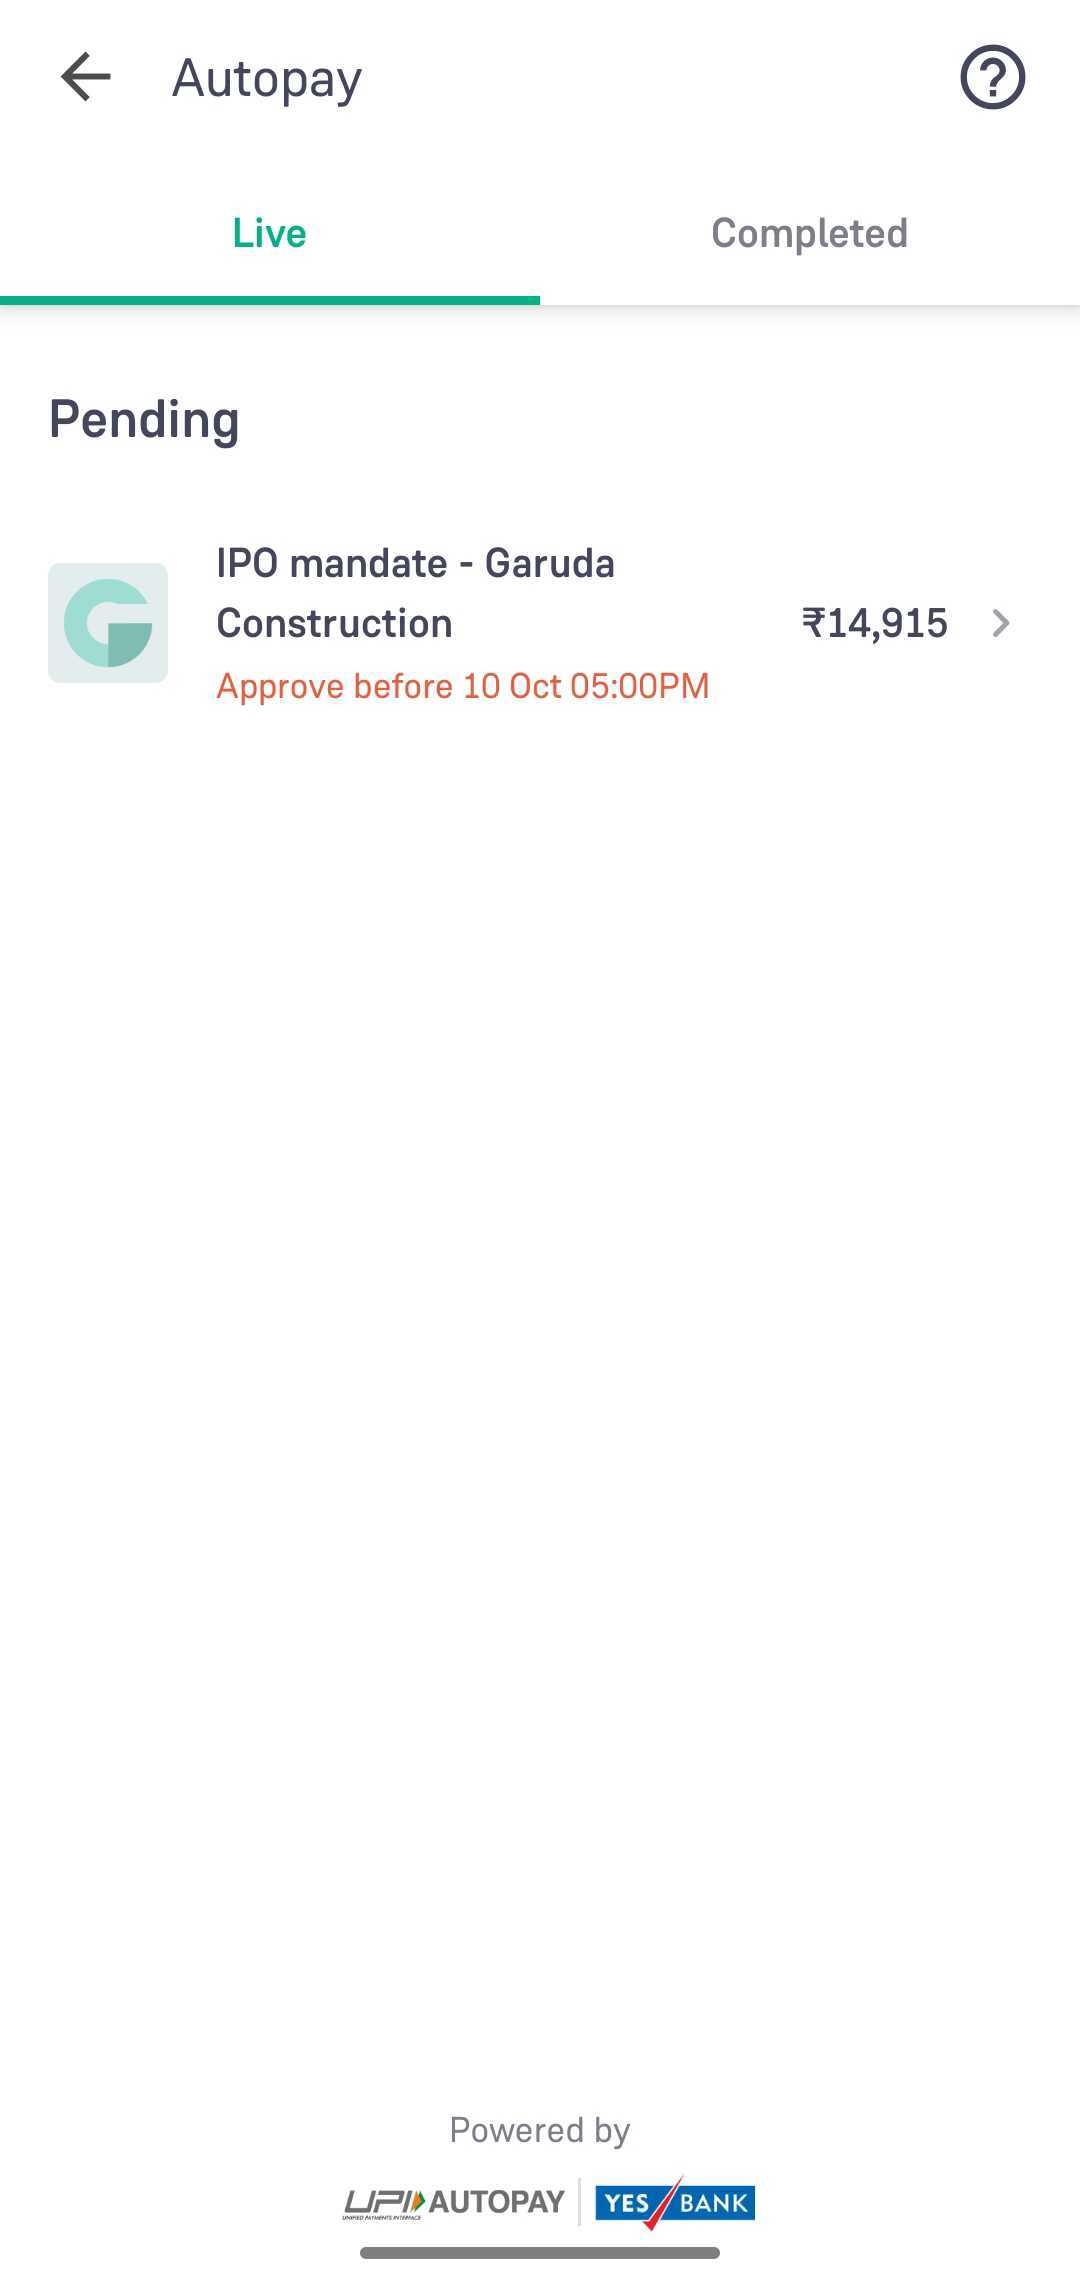
If you scroll down, you will also see a ‘UPI Autopay’ option under UPI Options. By clicking on that option, you will find the pending and approved IPO requests in the ‘Live’ tab.
Step 2: Once you click on ‘View IPO Request’ or Pending IPO, you will be able to see the IPO’s name and the UPI ID of the same, the amount to be blocked, and other details. On the same screen, you can see the ‘Approve’ and ‘Decline’ options.
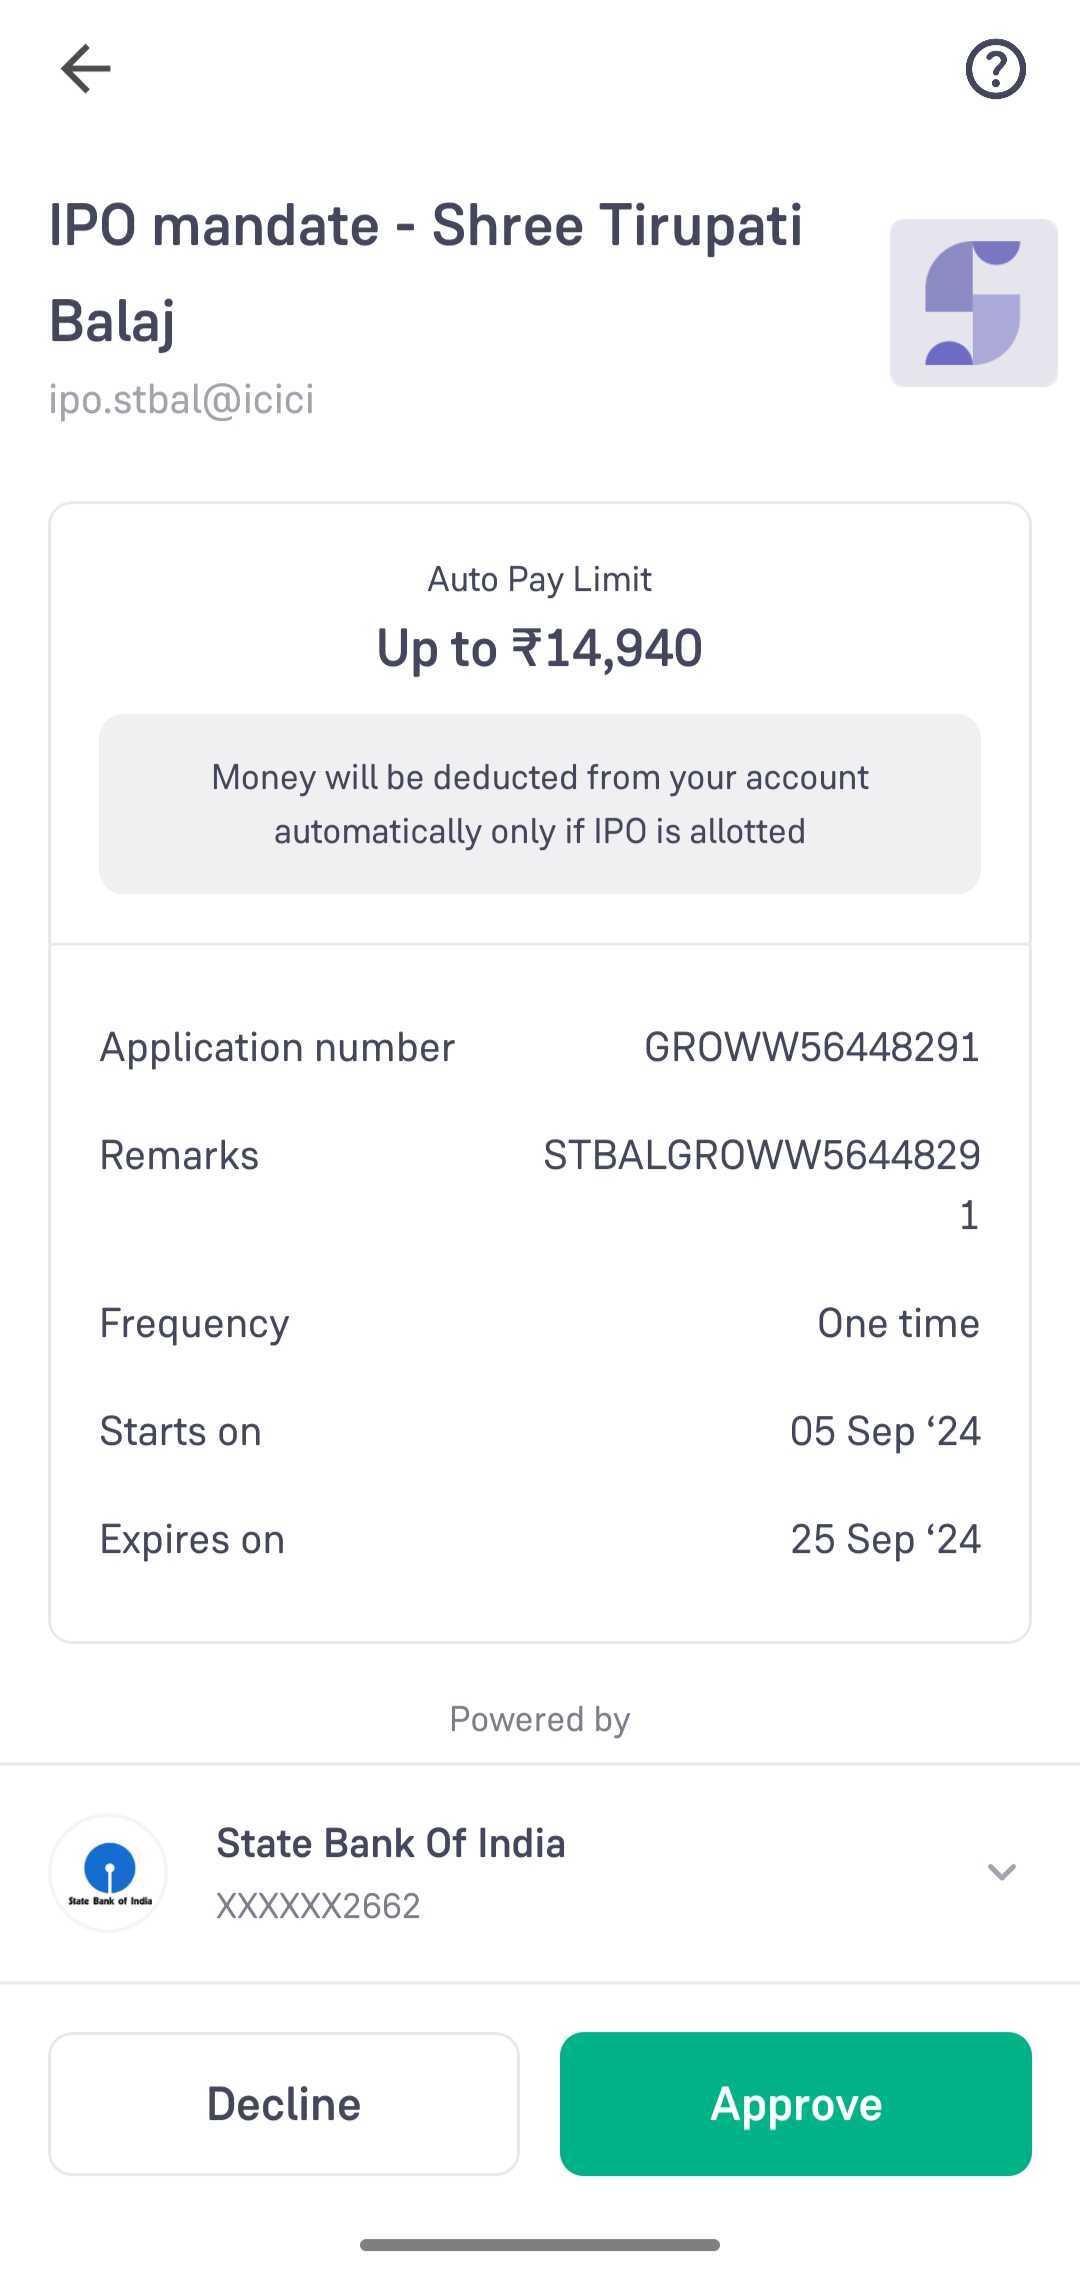
Step 3: Once you click on ‘Approve’, you will be asked to enter the UPI PIN, as is required by the app. After you successfully enter the UPI pin, you will see that the IPO creation has been successful.
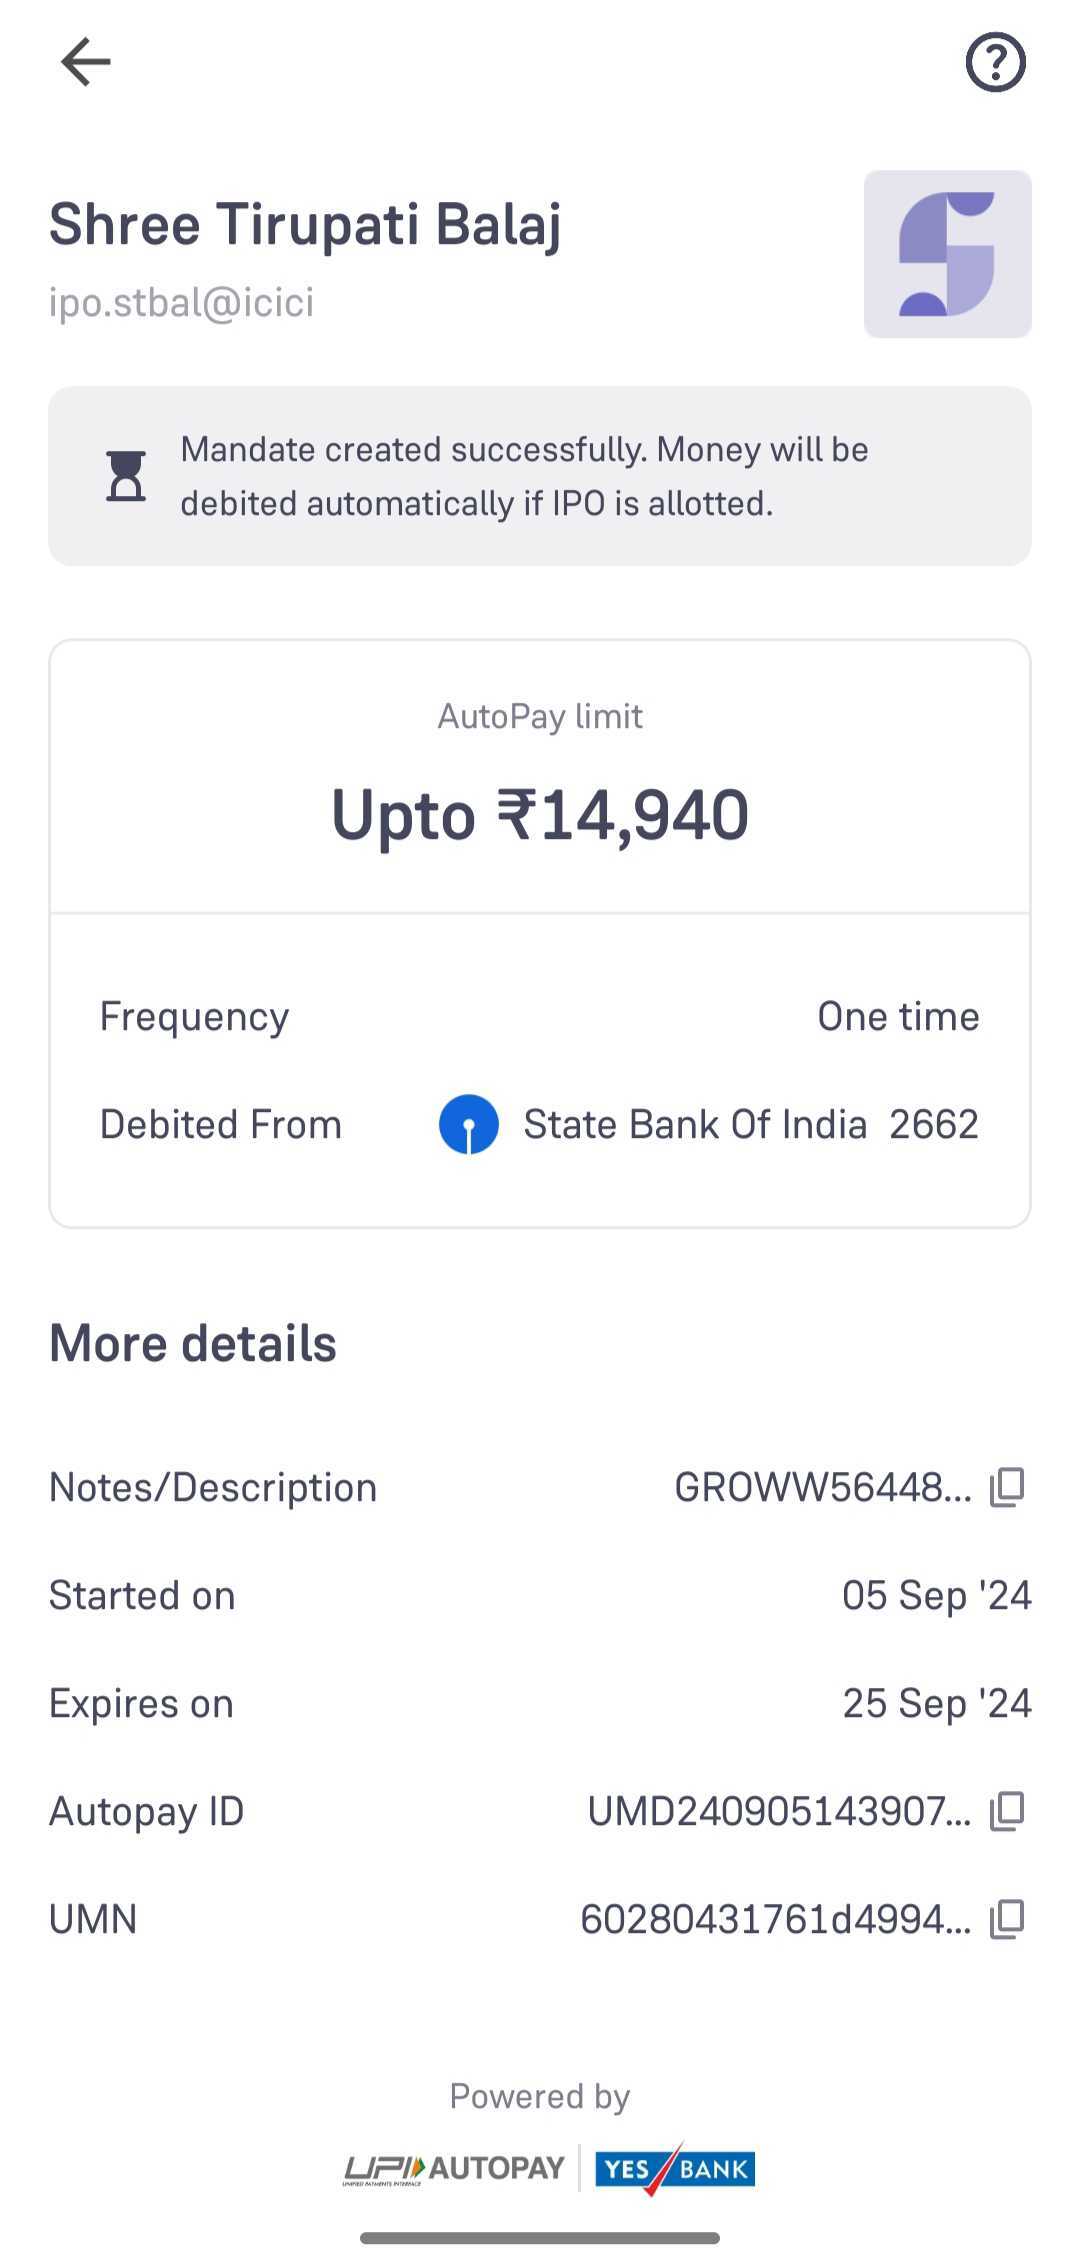
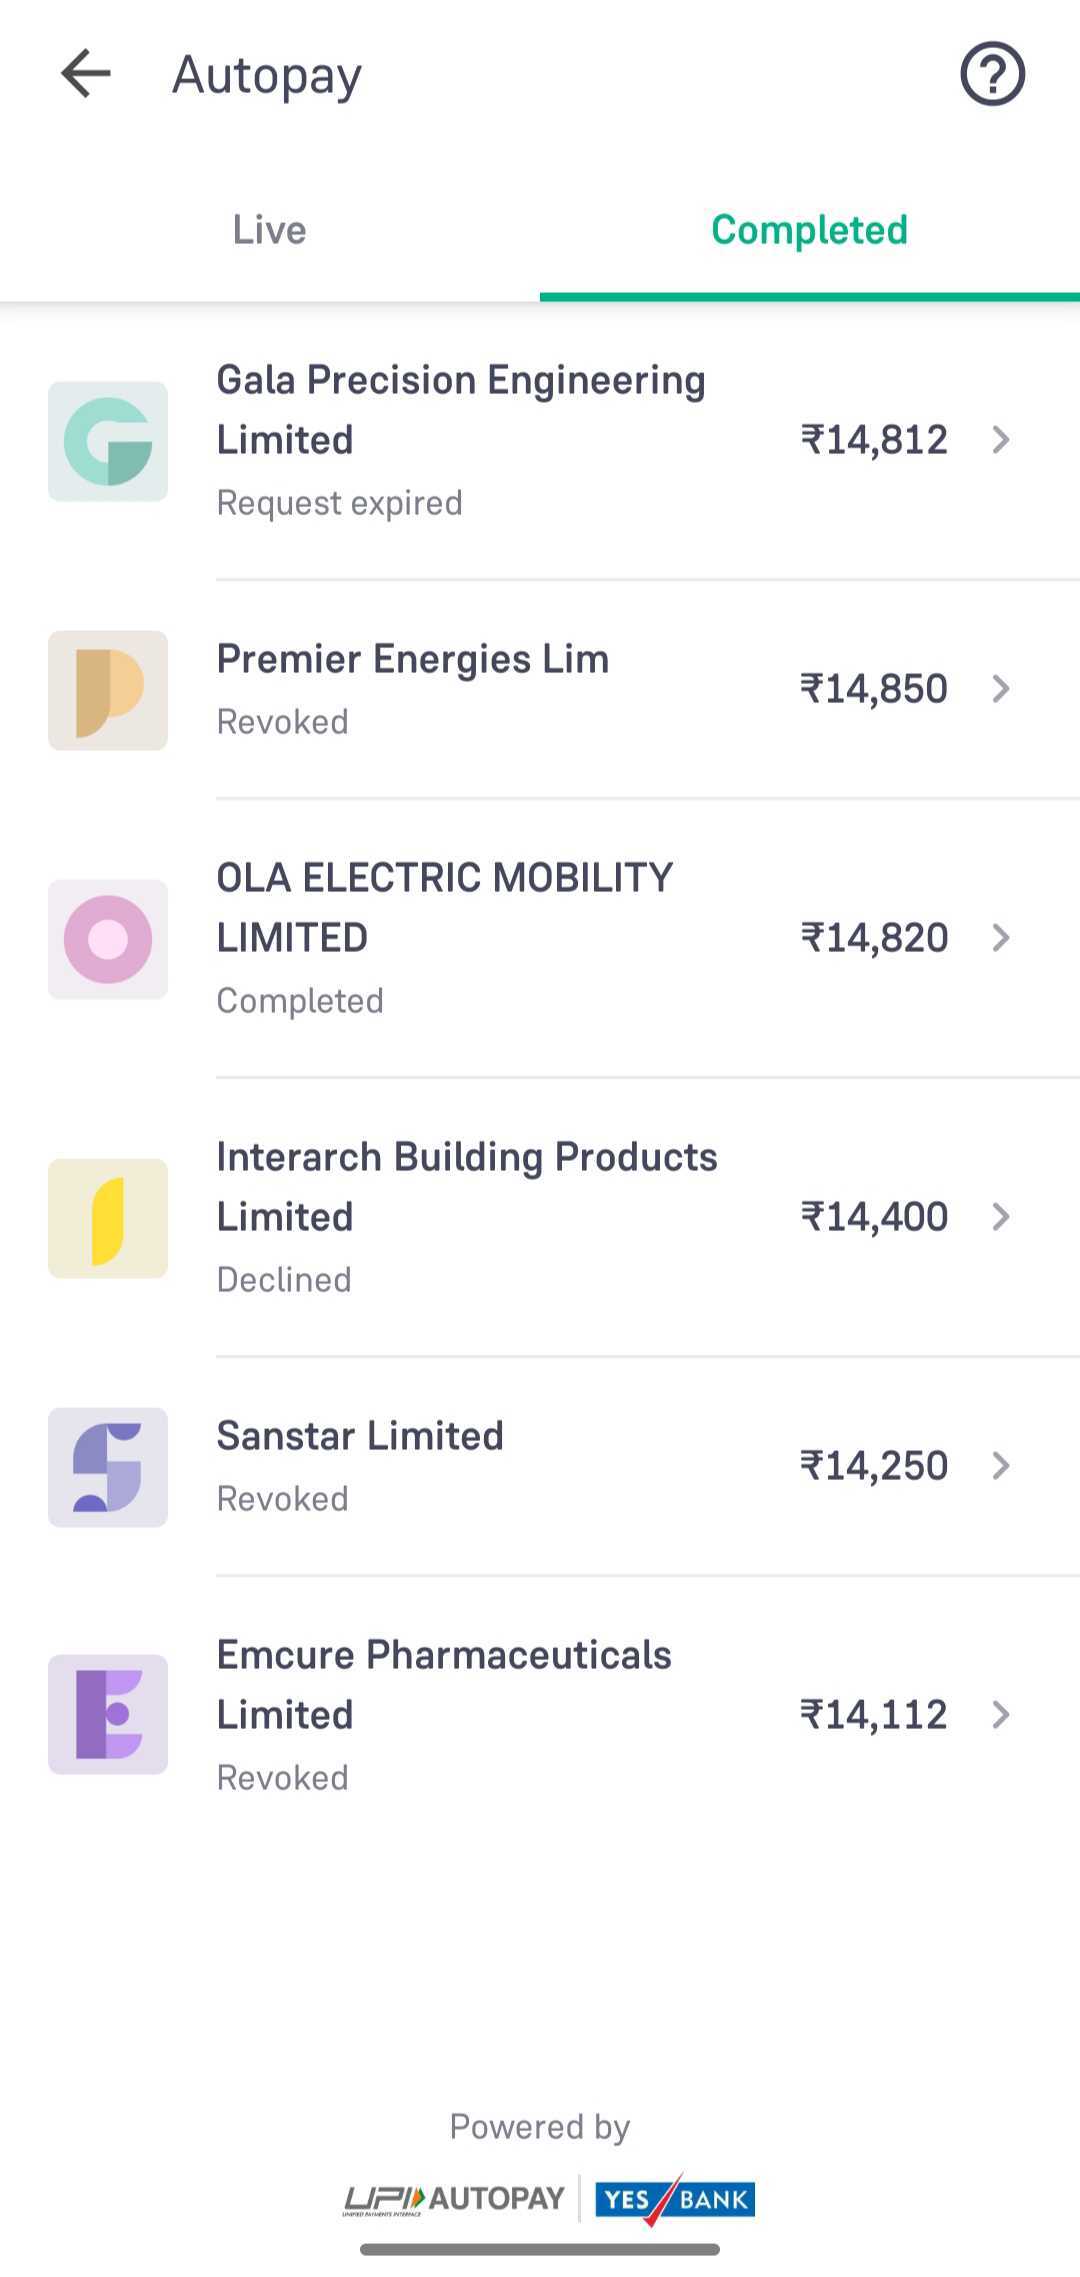
Step 4: You can see the completed IPO requests in the ‘Completed’ tab.
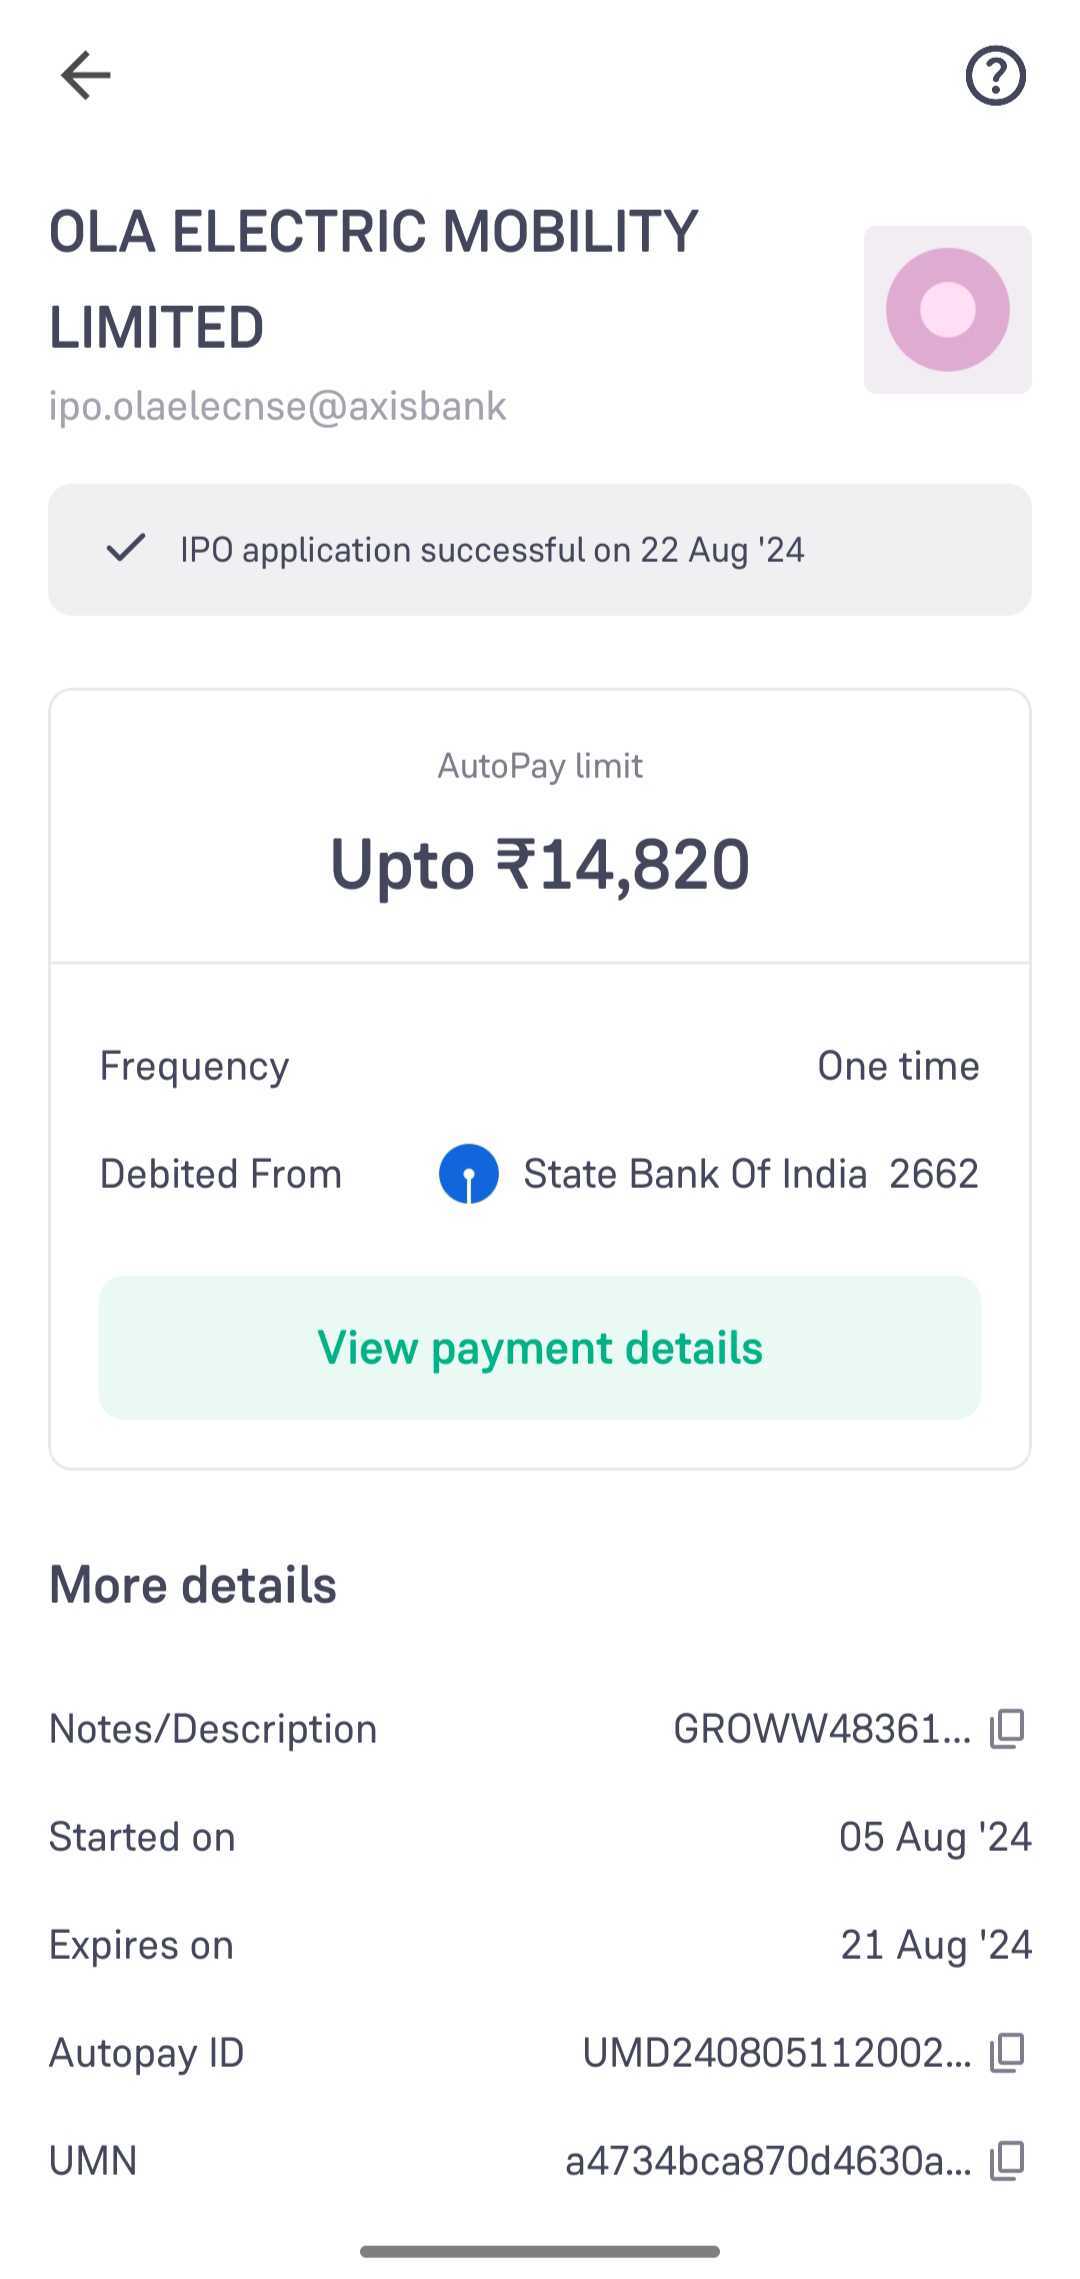
If you get the allotment, then the amount will be automatically deducted from your account.
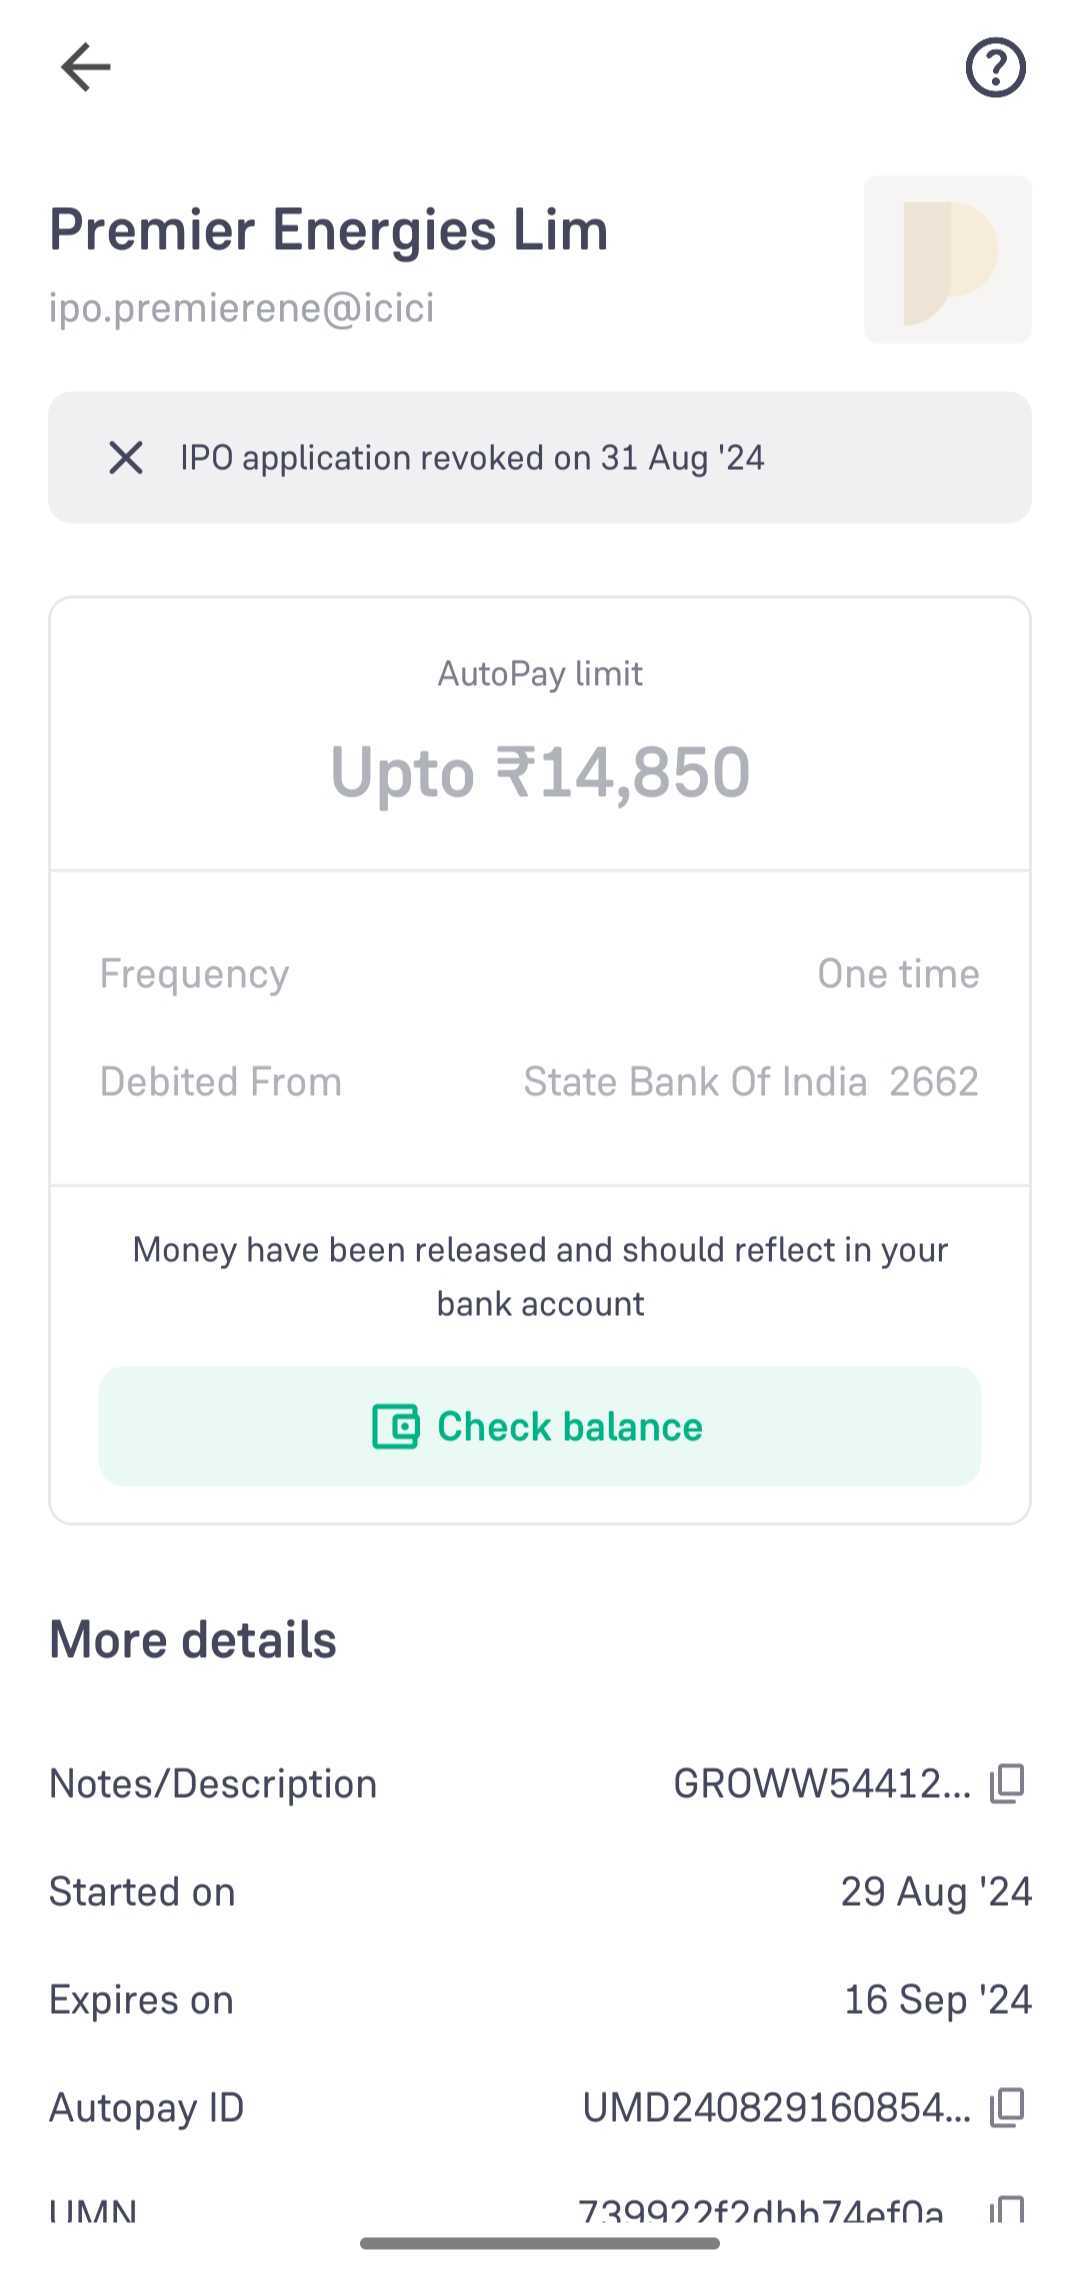
If you do not get the allotment, the amount will be unblocked.
How to Find IPO Mandate on BHIM
For the example and to provide a clear explanation, we have captured a user’s journey on the BHIM app while applying for the IRFC IPO.
Step 1: Open the application on your mobile and find the ‘Mandates’ section on the homepage. 
Step 2: Once you click on ‘Mandate’, you will be able to see any pending IPO requests that need your approval. On this screen, you will be able to see the IPO’s name and the UPI ID of the same, your account number, and the amount to be debited.

Step 3: Scroll down on the same screen to see the ‘Approve’ and ‘Decline’ tabs. Click on ‘Approve’.
 Step 4: Once you click on approve, you may be asked to enter a password/pin, as is required by the app. After you successfully enter the UPI pin, you will be able to see that the IPO creation has been successful.
Step 4: If you go back to the home page, you will see that there is an IPO tab as well. Please note: to approve IPO mandate requests, you will have to go to the ‘Mandates’ section only. The IPO will reflect in the ‘IPO section’ only after you approve it, according to the above-mentioned steps.
Step 5: Once you click on it, you will be able to see two tabs: ‘Pending’ and ‘Active’. The Active tab will have the IPO mandates that you have already approved.

The Pending tab will show IPO mandates that have not been approved yet. The request can be approved from the ‘Mandate’ section only and not from this section.
How to Find Mandate on Kotak BHIM UPI
Step 1: Open your Kotak Bank app and find the ‘BHIM UPI’ option on the home page.
Step 2: Click on UPI Mandate on the next screen.
Step 3: On the next screen, your name and CRN number will be mentioned. Enter your PIN to proceed.
Step 4: The next screen will show you three tabs for ‘Sent’, ‘Received’ and ‘Pending’ mandates. Click on ‘Pending’ to see the latest mandate that requires your approval.
Step 5: Click on the pending mandate and the next screen will show you the necessary details about the mandate. Like in this case, the details that you will be able to see are amount, your UPI ID, the recipient UPI ID, remarks, validity of the mandate etc.
Step 6: Accept the mandate request and click on ‘Ok’ once the app pops another notification to confirm the same.
Step 7: On the next screen, confirm the payment.


